14 Clever Edging Ideas Around Trees (That Are Actually Doable!)
Let’s be real, those boring, overgrown tree bases can really mess with the vibe of your yard.
But with a little creativity (and zero need for a landscaping degree), you can totally transform them into standout spots.
Whether you’re going for clean and polished or rustic and earthy, these tree edging ideas will give your yard that “I know what I’m doing” kind of look, without you breaking your back (or your budget).
Why Tree Edging Actually Matters
Okay, I used to think edging around trees was just about looking pretty, and sure, it does make your yard pop, but there’s way more to it than just curb appeal.
Here’s why edging your trees is worth it:
- Prevents grass and weeds from creeping into mulch or soil.
- Protects tree roots from accidental mower or trimmer damage.
- Keeps mulch tidy so it doesn’t wash out during rain.
- Creates visual structure so your yard looks clean and intentional.
Trust me, once I started edging around my trees, my entire garden felt more polished. It’s like giving your trees their own little stage!
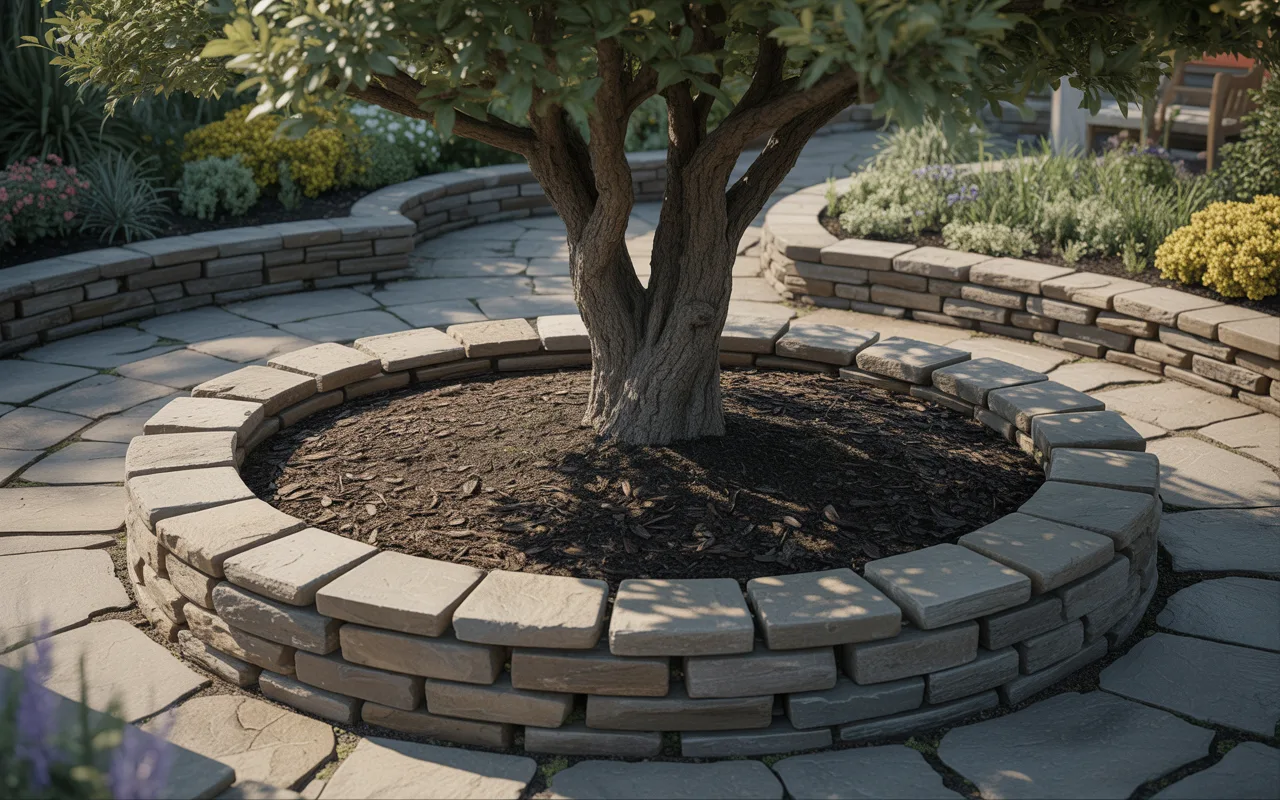
1. Stone Border Edging
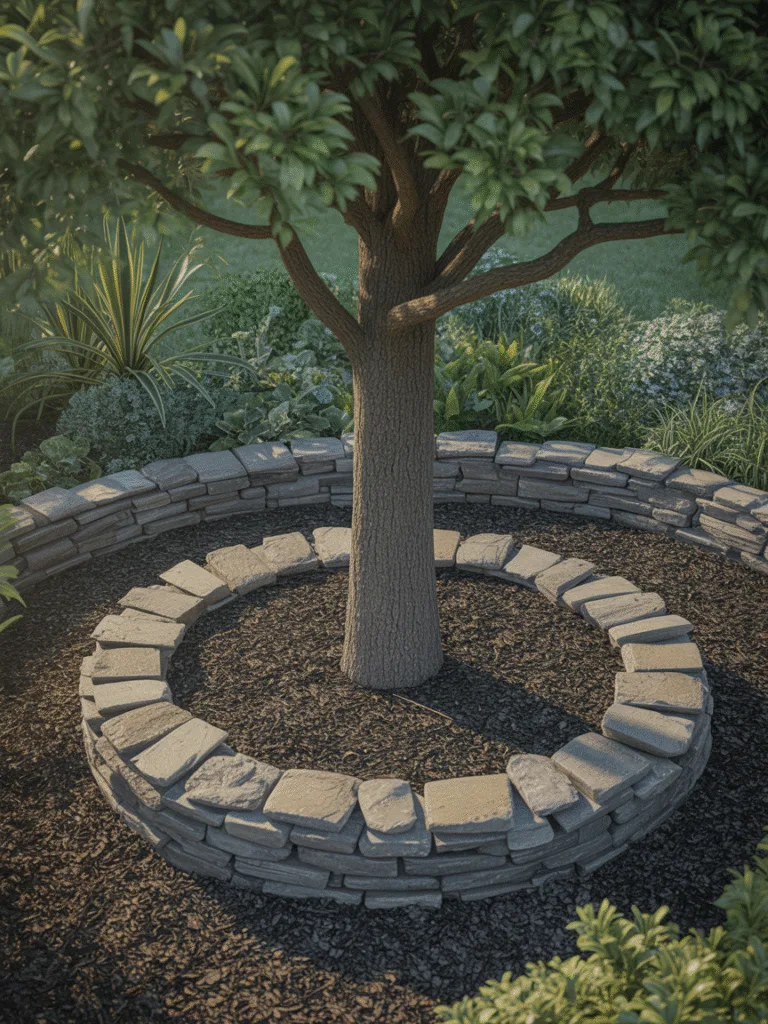
This is a classic, and for a reason. I used this around the big old oak in my front yard, and wow, it made such a difference.
Why it works:
Stone edging is durable, beautiful, and gives a timeless look. You can keep it rustic or go sleek depending on the stone you pick.
Here’s how I did mine:
- Dug a shallow trench around the tree.
- Laid flat pavers snugly in place.
- Filled any gaps with soil and tamped it down.
Design Tips:
- Use flagstones or cobblestones for a traditional look.
- Want clean lines? Try rectangular pavers.
- For a more natural vibe, go with irregular fieldstones.
Bold Takeaway: Stone edging = long-lasting, zero fuss once it’s down.
2. Metal Landscape Edging
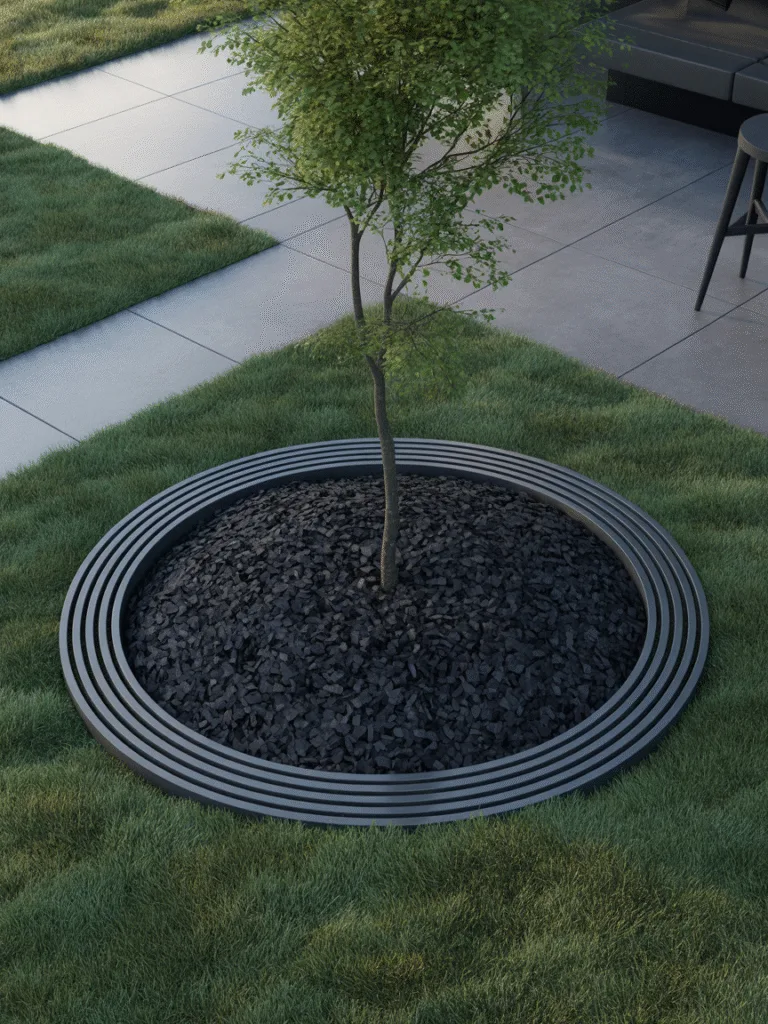
This is for those of you who love a minimalist, modern yard. Metal edging gives you that crisp, barely-there line that’s super tidy and sophisticated.
Why I love it:
It’s almost invisible, but your eye still catches the neat circle around the tree.
What you’ll need:
- Flexible steel or aluminum edging (you can buy rolls or strips).
- Landscape stakes.
- A mallet and a little patience!
Key Points:
- Steel edging is stronger and more durable.
- Aluminum is rust-proof, and lighter.
- Curve it around your tree and stake it firmly into the ground.
Pro Tip: This looks especially sleek when you use black mulch inside the circle!
3. Brick Circle Edging
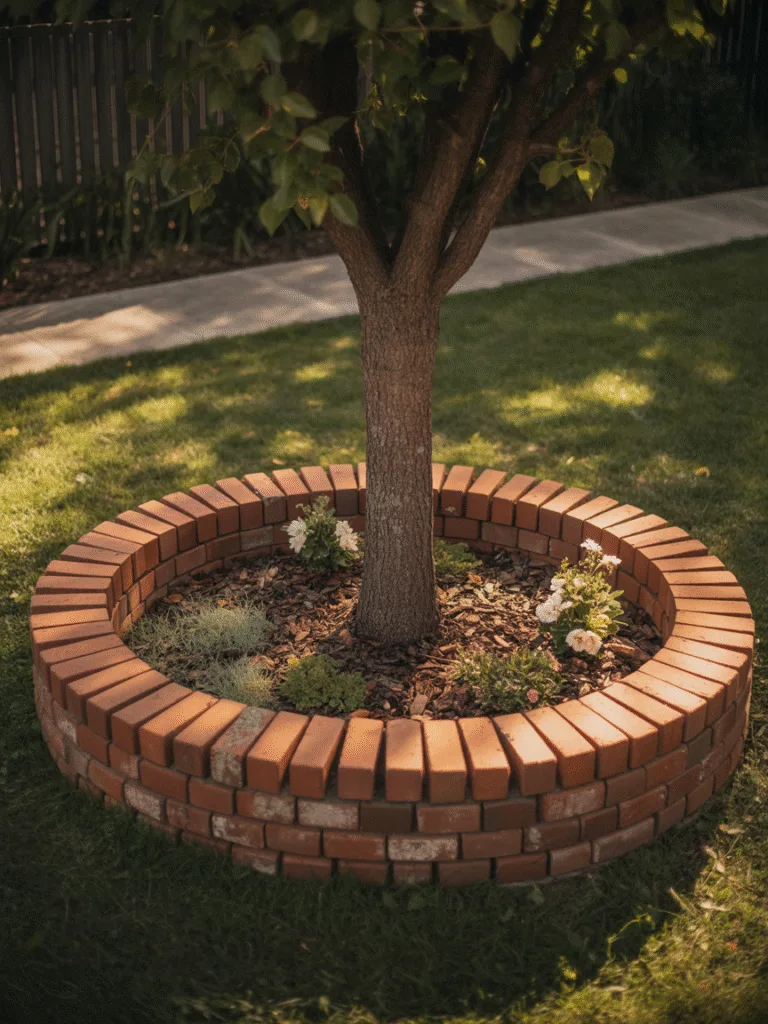
There’s something nostalgic about using bricks. It feels cozy and homey, and it’s surprisingly easy to DIY.
Why bricks are awesome:
They’re affordable, easy to find (check salvage yards!), and super customizable.
What I did for my backyard tree:
- Laid bricks on edge to make a mini wall.
- Secured them with a thin layer of mortar.
- Filled the inside with mulch and a few flowers for fun.
Options:
- Stack bricks for a raised look.
- Lay them flat for a subtle ring.
- Alternate colors or patterns to get fancy.
Bold Benefit: Bricks make any tree look instantly “landscaped”, even if the rest of your yard is still a work-in-progress.
4. Rubber Edging Roll (Kid and Pet Friendly)
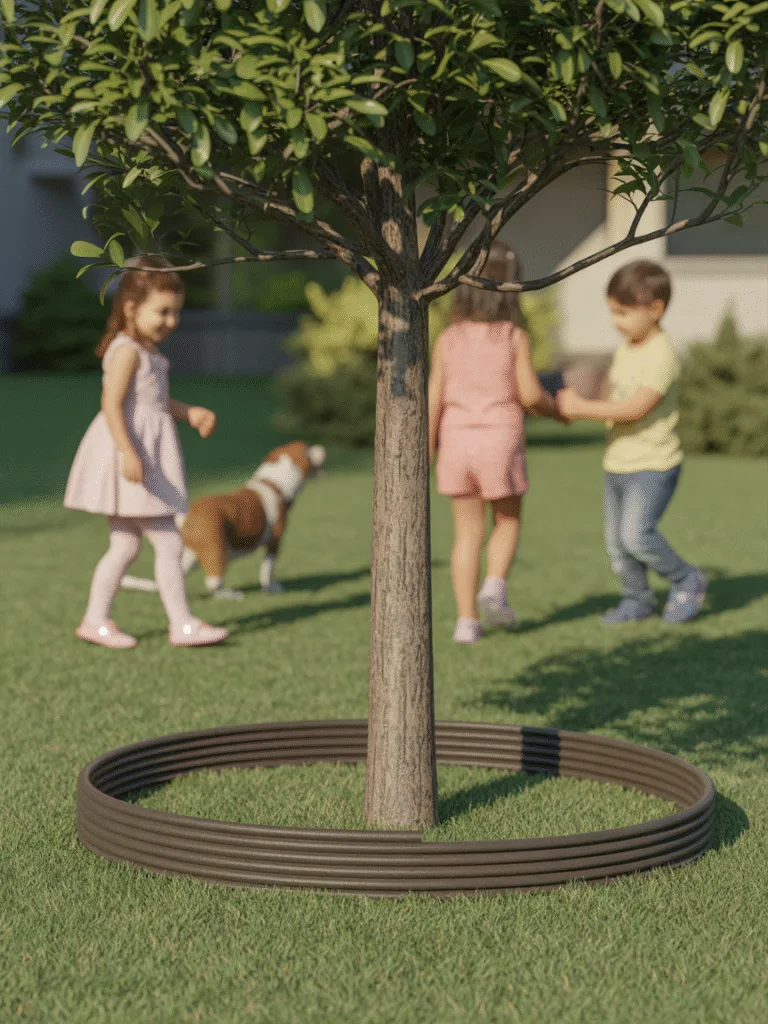
If you’ve got kids or rowdy pups like me, this one’s for you. Rubber edging is soft, safe, and surprisingly good-looking.
Here’s the deal:
It’s made from recycled materials and comes in rolls you can shape however you like.
What I liked most:
- Super easy to install (no digging!).
- Flexible enough to curve around any tree.
- Safe, no sharp edges or tripping hazards.
Tips:
- Look for styles that mimic wood or stone if you want the natural look.
- Use metal landscape staples to keep it in place.
Bold Truth: This is the most forgiving option if you’re not super handy (or just short on time).
5. Wooden Log Border

This one’s a bit more rustic, and it’s perfect if you love that cabin-in-the-woods look. I used leftover logs from a tree we had cut down and made a border that looks straight out of a woodland fairytale.
How to do it:
- Cut logs or branches into short, even sections.
- Bury them upright in a circle around the tree.
- Leave a few inches sticking up for that “mini fence” vibe.
Variations:
- Use half logs for a chunky border.
- Mix heights for a whimsical look.
- Stain or seal them if you want to extend their life.
Eco Bonus: You’re reusing what you have, and that always feels good.
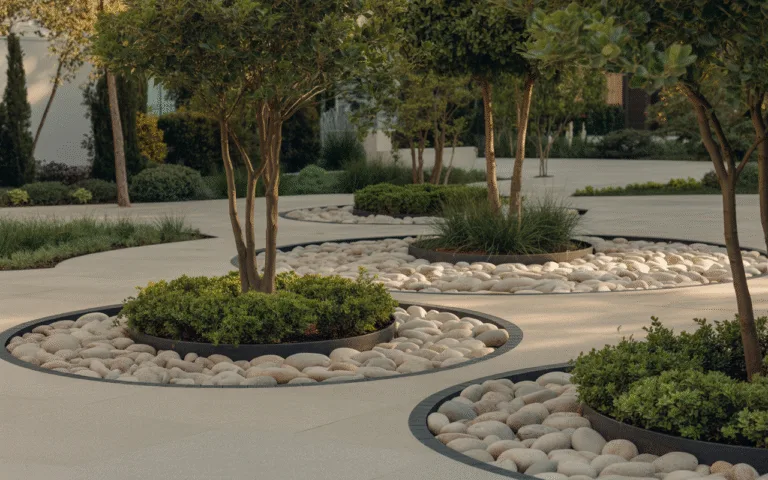
6. Gravel and Metal Ring Combo

This combo is sleek and super low maintenance. I saw it at a friend’s house and had to try it around my backyard maple.
Here’s why it works:
The metal ring keeps everything contained, while the gravel adds texture and drains well.
What you’ll need:
- A metal tree ring (you can buy these pre-made or bend one yourself).
- Landscape fabric to keep weeds out.
- Pea gravel or crushed stone for filler.
Tips for style:
- Use white gravel for a clean, zen vibe.
- Go for dark grey or black stone for contrast.
- Add a solar light or two for nighttime magic.
Maintenance Tip: Just rake the gravel now and then to keep it fresh.
7. Mosaic Tile Edging
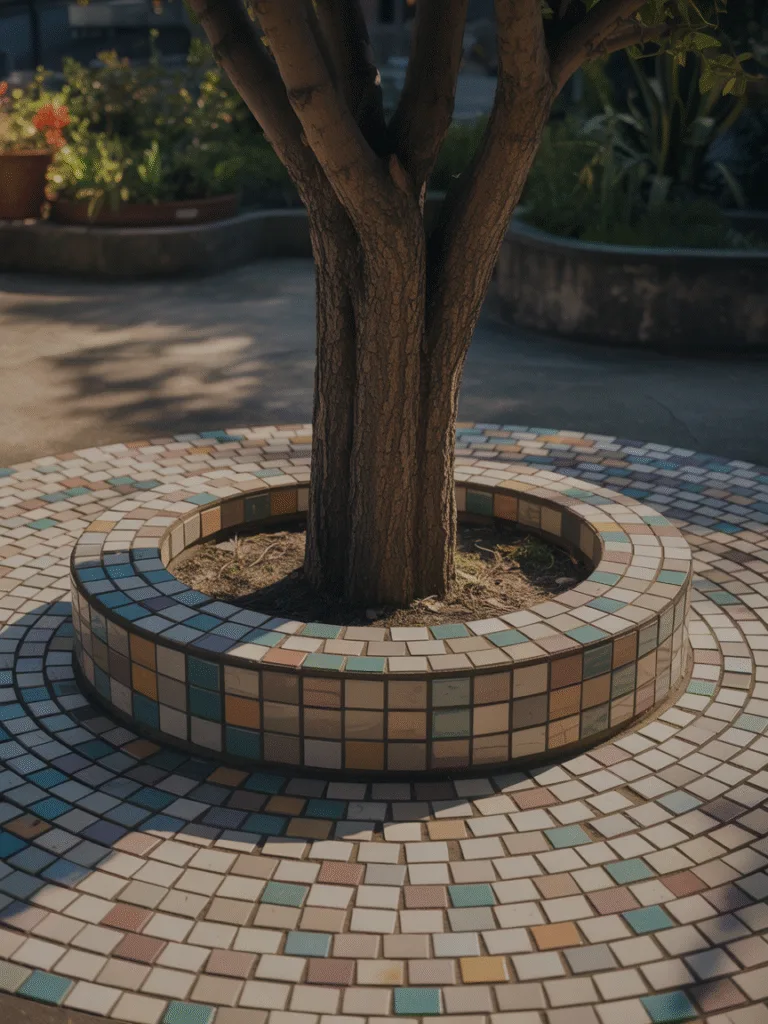
Okay, this one’s a little more artsy, but hear me out. If you love color and want something one-of-a-kind, mosaic edging is where it’s at.
What I did for mine:
I took broken tiles (some were from old plates!) and embedded them in cement around the base of my tree.
How to make it shine:
- Use tile adhesive and grout for longevity.
- Mix shapes and colors for personality.
- Seal the surface to protect against weather.
Good To Know:
- This is best for trees in high-visibility areas.
- It doubles as garden art!
Creative Edge: No one else on the block will have anything like this.
8. Raised Planter Ring
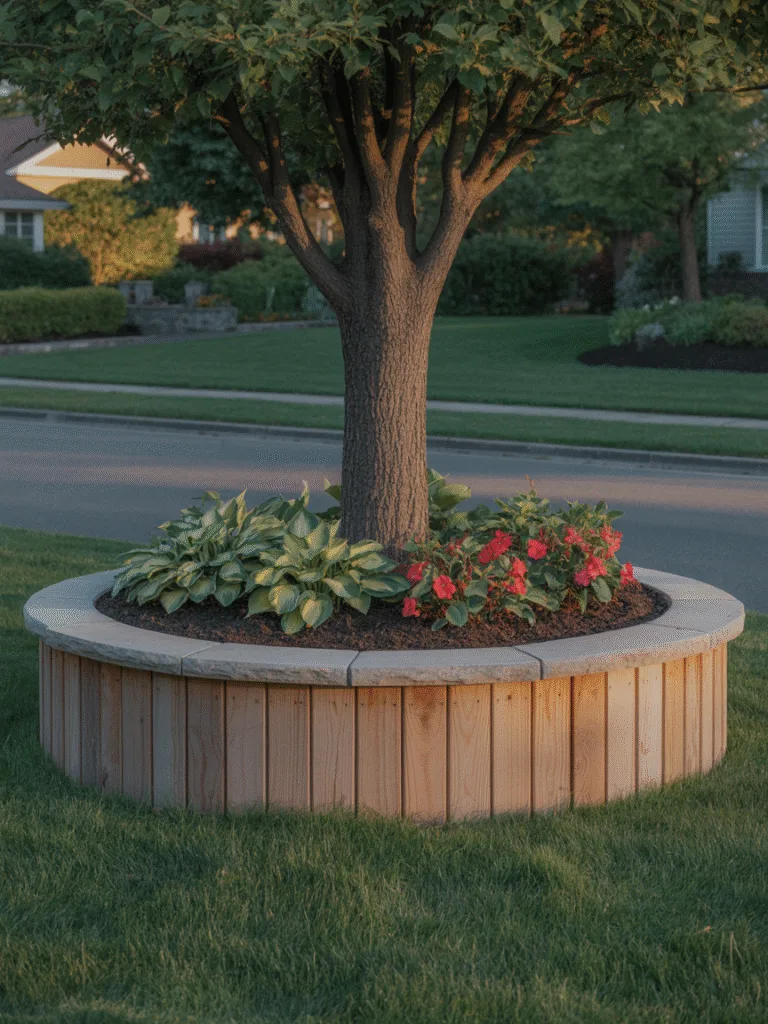
Want your tree base to be more than just mulch? Turn it into a raised flower bed. This one turned my boring front yard into a full-blown feature.
What I built:
- A circular wood frame using pressure-treated boards.
- Filled it with topsoil, mulch, and seasonal flowers.
- Added a stone cap to make it feel fancy.
Things to keep in mind:
- Don’t stack soil too high near the tree trunk, you want airflow.
- Choose shade-loving plants like hostas or impatiens.
- Add a drip irrigation line if you’re feeling ambitious.
Bold Payoff: This turns your tree into the centerpiece it deserves to be.
9. Terracotta Pot Border
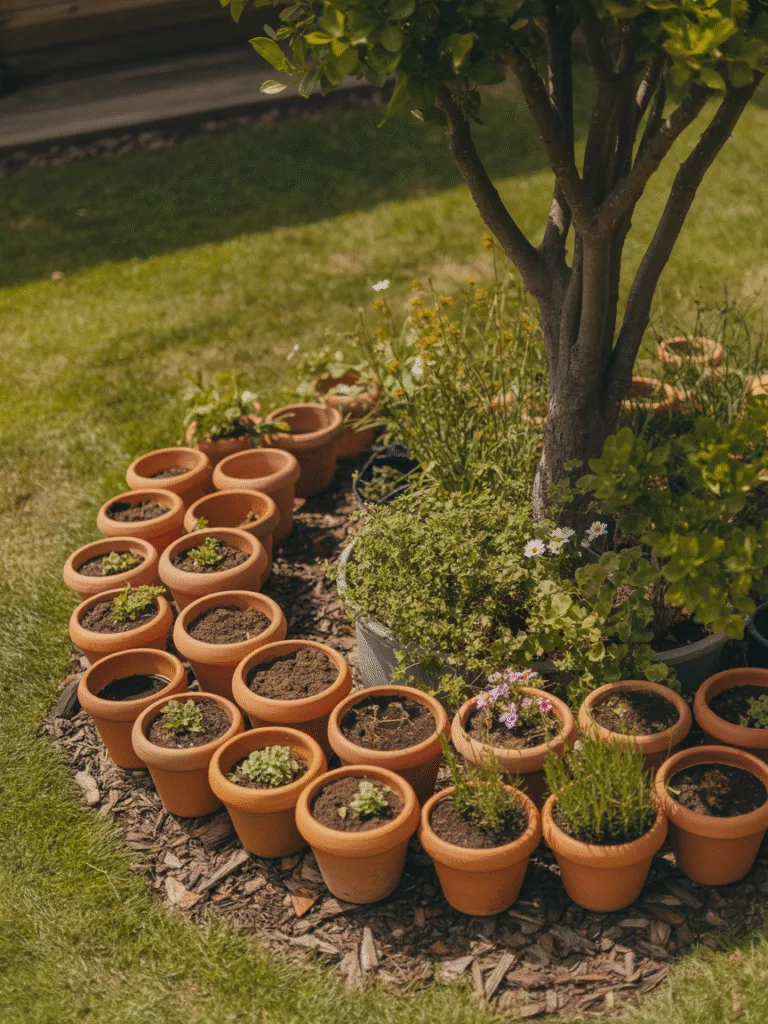
This one’s honestly a personal favorite! It’s quirky, charming, and you probably already have a few old pots lying around.
Why it works:
Terracotta pots give a playful, Mediterranean garden vibe. I tilted mine slightly outward in a circle around the tree, and it looked adorable.
How to set it up:
- Use small to medium-sized terracotta pots.
- Bury the bottom third of each pot at a slight angle.
- Space them evenly to form a ring around the base.
Design Tips:
- For extra flair, fill the pots with succulents, herbs, or cascading flowers.
- Alternate sizes or colors for a more eclectic look.
- Use broken pots creatively to give it an aged, artsy vibe.
Bold Bonus: This edging doubles as mini planters, so you’re not just decorating—you’re planting too!
10. Woven Willow Edging
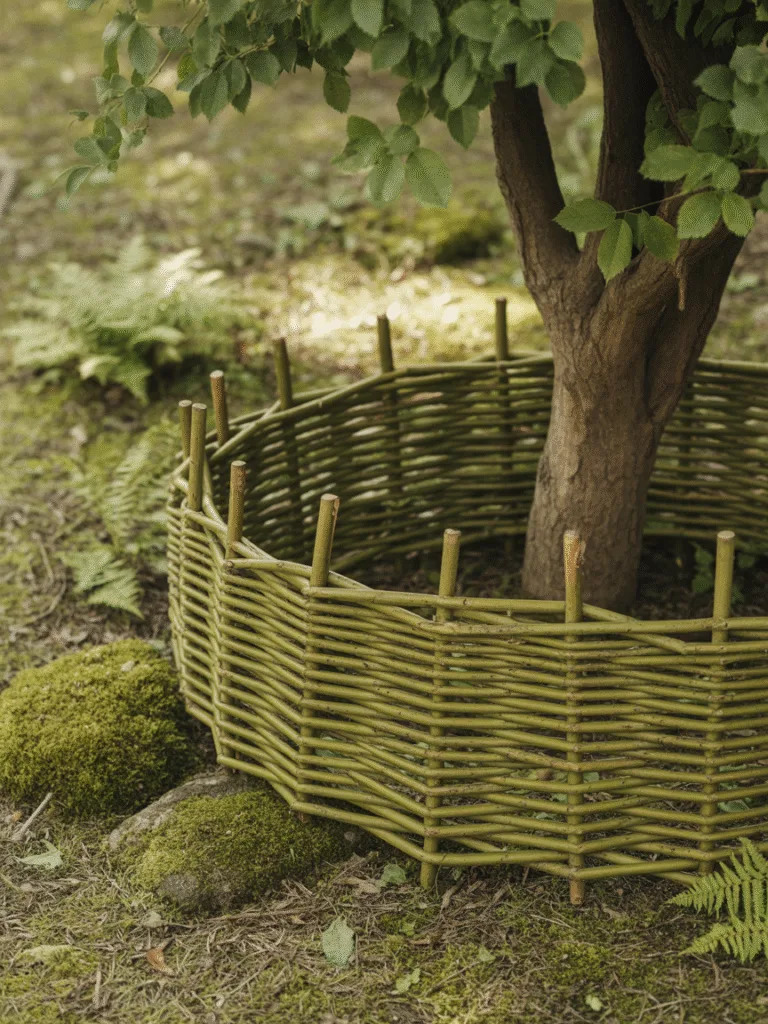
If you love a natural, earthy style, woven willow edging is such a cool option. It brings a soft, handcrafted touch that feels totally intentional.
Why it’s amazing:
This method gives your tree a storybook garden feel and works especially well in shaded or woodland-style landscapes.
What you’ll need:
- Flexible willow or hazel branches (you can buy bundles or collect them).
- Wooden stakes or garden pins to anchor the structure.
- A little time to weave—it’s oddly therapeutic!
Key Features:
- Soft, rounded lines that blend into nature.
- Easy to shape and resize as the tree grows.
- Looks especially pretty with ferns or mossy ground cover.
Eco-Friendly Tip: You can reuse pruned branches from other parts of your yard—zero waste, 100% charm.
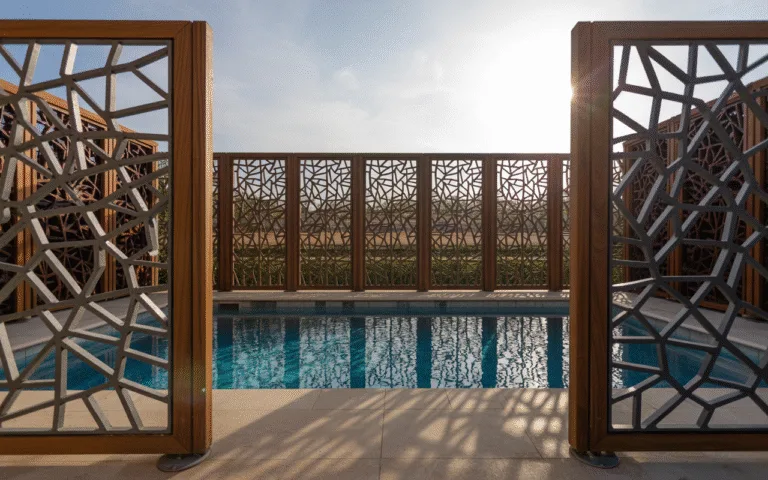
11. Decorative Fence Panels

Think mini picket fences or Victorian-style garden borders. These can be both cute and protective—especially if you’ve got dogs that like digging around your trees.
Why they’re useful:
Fence panels add visual height and define space without being too bulky or permanent.
How I used mine:
- Got a set of white plastic garden fence panels from the hardware store.
- Pushed them into the soil around my maple tree.
- Added some mulch and shade plants inside the ring.
Options:
- Choose metal panels for durability.
- Use colorful painted wood for a playful look.
- Mix and match panel styles for a whimsical touch.
Bold Win: These give your trees a “storybook garden” vibe in under 30 minutes—plus they help keep pets out!
12. Concrete Mow Curb
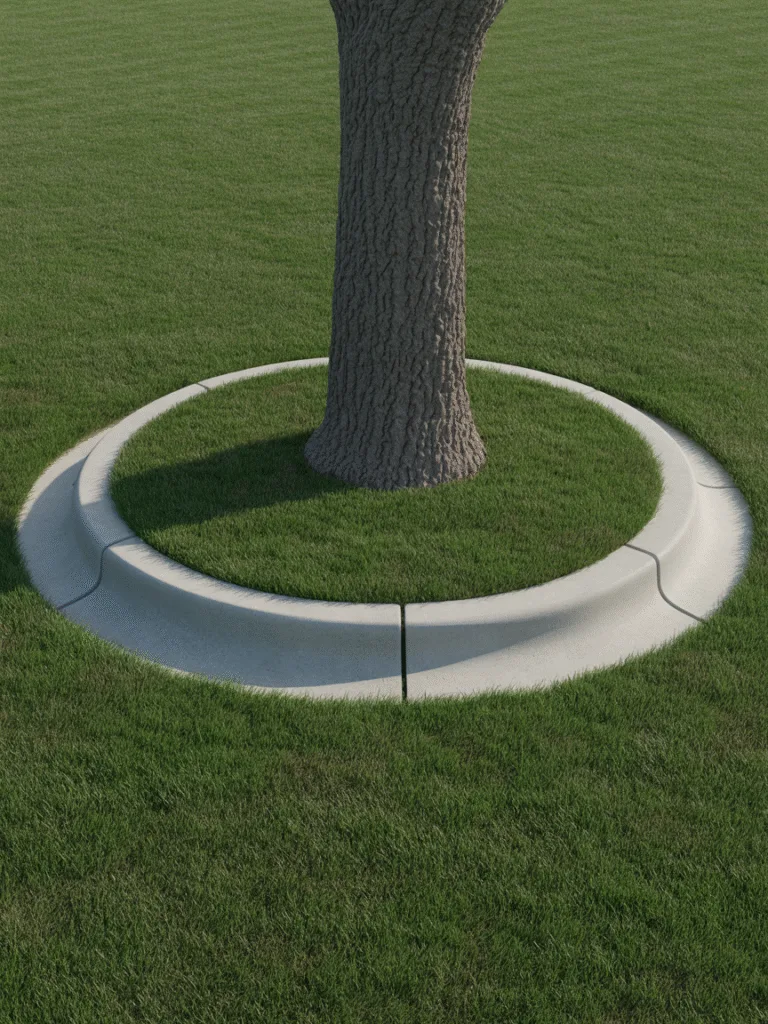
This one’s a bit more of a weekend project, but it’s so worth it if you like that clean, maintenance-free finish.
Why it rocks:
Concrete mow curbs act as both edging and mowing guides—no trimming needed around your trees!
What you’ll need:
- Concrete mix or premade concrete curbs.
- A curb form (you can DIY this or rent a kit).
- Trowels, gloves, and a bit of elbow grease.
Benefits:
- Super durable and long-lasting.
- Keeps grass and weeds from invading.
- Makes mowing crazy easy—just follow the edge!
Curb Appeal Tip: Use a curved form for softer edges or add a color tint for a modern finish.
13. Upcycled Glass Bottle Border
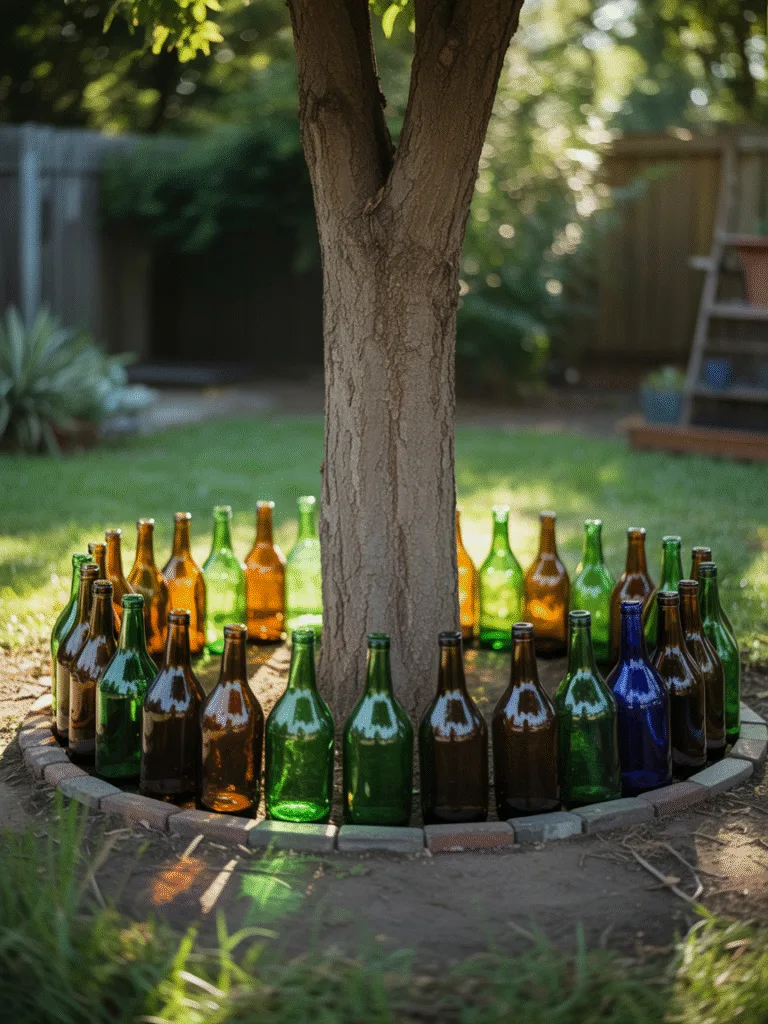
This idea is perfect if you’re the artsy or eco-conscious type. It looks cool, costs basically nothing, and adds serious character to your landscape.
How it works:
Bury glass bottles neck-down around the tree to form a border. You can use matching bottles for a uniform look or mix colors for a mosaic-style effect.
How I did it:
- Collected green and brown wine bottles from friends (okay, and from a couple of fun weekends).
- Dug a narrow trench and buried them about halfway down.
- Lined them up in a tight circle.
Safety Tip:
- Make sure bottles are firmly buried to avoid tipping.
- Avoid using thin or breakable glass.
Bold Detail: When the sun hits the glass just right, it casts the prettiest little glow around the base of the tree.
14. Raised Herb Ring
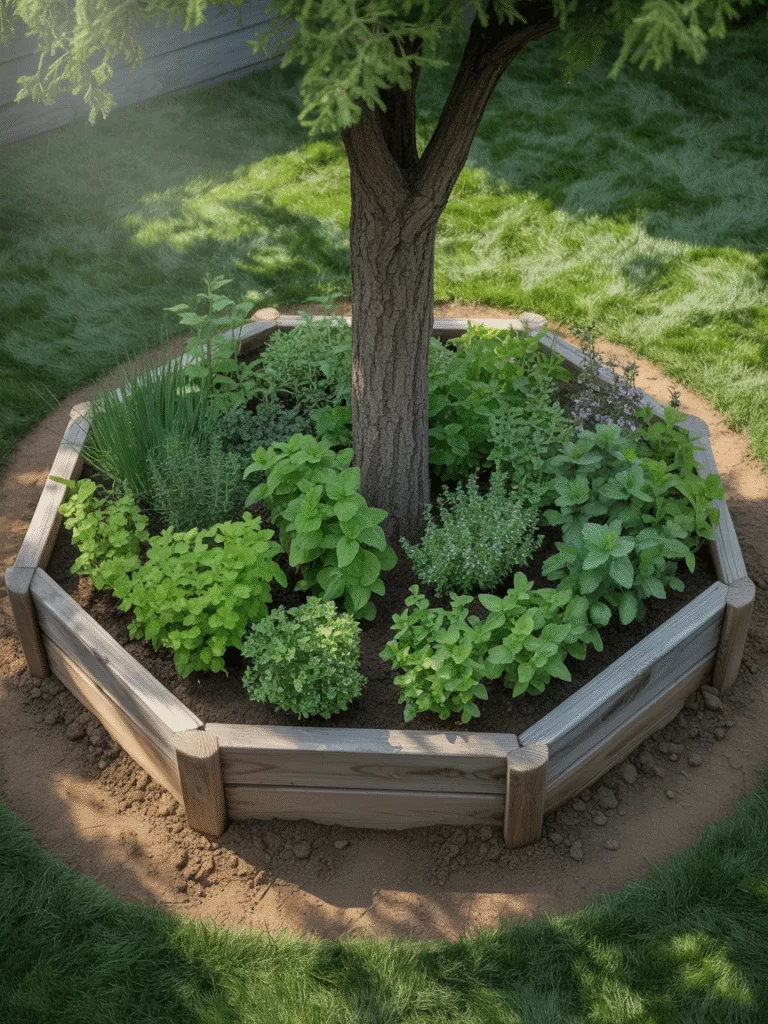
Why not make your tree edging useful and delicious? This idea turns the base of your tree into a mini herb garden—yes, really!
Why I love it:
It’s practical, pretty, and smells amazing. Plus, you’ll always have fresh herbs right outside your door.
What you’ll need:
- A low circular raised bed frame (wood, stone, or metal).
- Potting soil mixed with compost.
- Herbs like parsley, mint, thyme, or oregano.
Tips for success:
- Stick with herbs that tolerate partial shade.
- Don’t crowd the tree trunk—keep a buffer zone.
- Water regularly since herbs tend to dry out faster.
Tasty Tip: Snip herbs as needed for cooking, teas, or garnishes—your landscaping just became your pantry!
Common Mistakes to Avoid
Let’s save you from the trial and error phase I went through, okay?
- Piling mulch too high around the trunk (aka “mulch volcano”), this can rot the tree.
- Using concrete directly against roots, they need to breathe!
- Choosing edging that’s too tall, you’ll trip on it or hit it with your mower.
- Skipping landscape fabric, unless you love pulling weeds every weekend.
Quick Fixes: Always leave space between the trunk and the edge material, and double-check how your choice holds up in your climate.
FAQ
How big should the tree edging circle be?
A good rule of thumb is to make the circle at least 2-3 feet wide from the trunk. This gives roots space, keeps tools away from the base, and visually balances the tree.
What’s the easiest edging material for beginners?
Hands down, rubber edging or metal strip edging. They’re flexible, forgiving, and don’t require digging deep trenches or using mortar.
Can I plant flowers inside the tree ring?
Absolutely! Just make sure the tree gets enough water and light. Use shade-tolerant, shallow-rooted plants, and don’t disturb the tree roots when planting.
Will edging stop roots from growing out into my lawn?
Not entirely. Tree roots are persistent little guys. Edging helps guide and protect the base, but if you’re trying to manage aggressive roots, a root barrier may be needed.
Is it okay to use gravel or stones around trees?
Yes, as long as the stones aren’t piled up against the bark. Gravel drains well, looks neat, and works great with proper edging to hold it in place.
Final Thoughts
Whether you want clean lines, rustic charm, or something completely unique, edging around trees is such an easy way to make your yard feel intentional and styled.
Pick one method, grab your supplies, and start with just one tree, you’ll be surprised how satisfying it feels to give it a proper “home base.”